• Sign Up! To view all forums and unlock additional cool features

    Welcome to the #1 Fiesta ST Forum and Fiesta ST community dedicated to Fiesta ST owners and enthusiasts. Register for an account, it's free and it's easy, so don't hesitate to join the Fiesta ST Forum today!


14’ Tuxedo Black | TURDBO BUILD

OP
xxiaze

xxiaze

Active member
Messages
624
Likes
627
Location
West Bend, WI, USA
Thread Starter #241
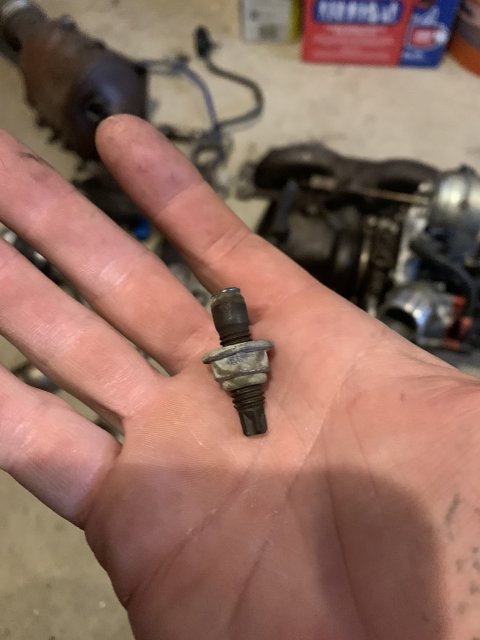
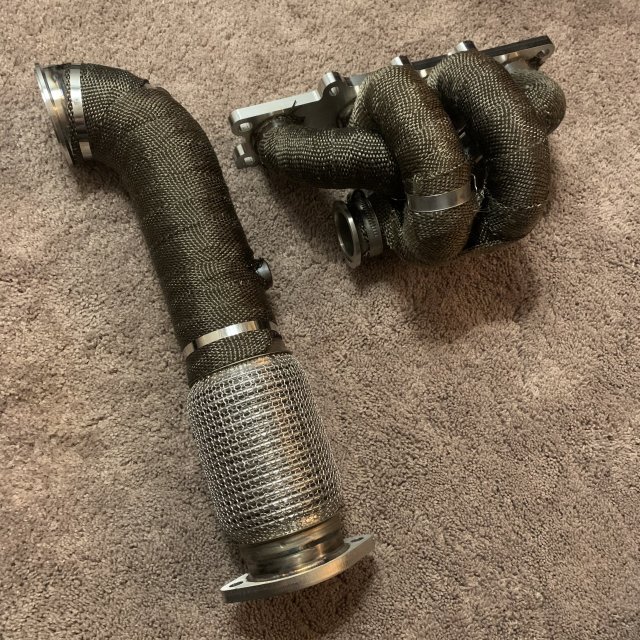
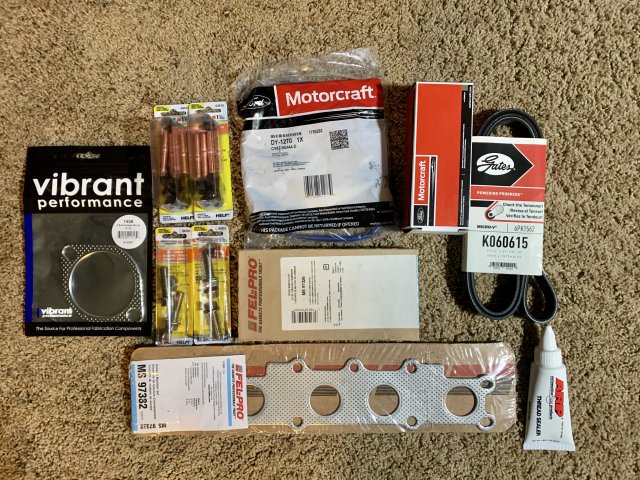
I do believe ARP makes them also for the FiST also*

Sent from my SM-N975U1 using Tapatalk
Unnecessary though and WAY too expensive... I just ordered two sets of the Dorman 03412 copper coated steel studs and nuts from rock auto. 15$ per set of 8 - 2 sets for 30$. OEM from Tasca is 45$ shipped. They were recommended by @Rocketst, said they were good quality. Took your advice too Aaron and ordered up 2 new 02 sensors. Just getting ducks in a row for when we power through this together in a few weeks.


OP
xxiaze

xxiaze

Active member
Messages
624
Likes
627
Location
West Bend, WI, USA
Thread Starter #242
So snapped a manifold stud... barely put a socket on it and pooped on me. Hopefully can extract it. Ordering some cobalt bits to get through the steel stud. Also, nice job with the 02 sensor install Ford... you didn’t even cross thread it. Anyways, old turbo setup is out... here’s a side by side against the g25-550.

52D99FDA-126A-426B-B30B-D789495CE715.jpeg 9ABAA8F5-5658-4EB4-ACDD-EF696A634737.jpeg 83ABB419-FBE1-49CD-BB4E-F8CF9B8ED600.jpeg
F2F784F7-4035-433E-9316-8B3233BB2C0E.jpeg


Last edited:
OP
xxiaze

xxiaze

Active member
Messages
624
Likes
627
Location
West Bend, WI, USA
Thread Starter #243
Just finished wrapping the downpipe and manifold in titanium wrap... hopefully it holds up alright. It’s not the tightest in the world and the steel bands that came with the roll are kinda wonky. Had to use some worm clamps here and there too. Not going for beauty lol... does anyone know how long this type of application usually holds up?

A68E1979-5824-4F50-B5FC-24BBCD7557F2.jpeg


OP
xxiaze

xxiaze

Active member
Messages
624
Likes
627
Location
West Bend, WI, USA
Thread Starter #245
This will help (and the cobalt left hand drill bits)....
View: https://youtu.be/dJfkCj3FWBs
Thanks man! Fortunately I was able to get it out using similar techniques found in this video. Cobalt center tapped it then rammed a torx bit into the hole and used a 1/4” ratchet to back turn the stud after soaking it in PB for a few hours.

DE9FC850-9372-41E8-B86A-98629E1F3FE0.jpeg


OP
xxiaze

xxiaze

Active member
Messages
624
Likes
627
Location
West Bend, WI, USA
Thread Starter #246
Alright so here’s a (likely) running list of the things I’ve needed to install my Peron turbo kit and 4port aux fuel so far: (group picture is incomplete but will post other supporting thumbnails from purchases)

Second hand Stratified 4port:
- Gates K060615 micro-v belt
- 2 sets of alternator spacers manufactured by a local machinist
- Assembling hardware
- 2x Felpro MS97326 intake manifold gaskets
- PnP harness

Peron turbo kit: (Most of these things are unique to my install, the first two items market with * were actually needed and missing from Peron kit)
* - 1/4” barb x 1/8” NPT male barbed fitting for turbo compressor housing boost pressure source
* - 1x Felpro MS97332 exhaust manifold gasket
- 2x Dorman 03412 manifold stud kits (M8x54mm) our manifold requires 9 pieces, boxes come with 8
- Motorcraft DY1285 Upstream 02 sensor
- Motorcraft DY1270 Downstream 02 sensor
- 1x custom turbo oil drain line made as seen in photo below
-1x Motorcraft 498Z-6N652-A Oil return gasket

Needed to modify injen exhaust for Peron kit:
- 2x Dorman 03423 Exhaust flange bolts
- 1x Vibrant 1458 3” exhaust flange gasket to repair cat back midsection flange
- 1x Vibrant stainless steel 2 bolt 3” exhaust flange to modify injen exhaust to 3” thru and remove the 2 1/2” reduction in the exhaust.
- 1x 3” stainless steel exhaust pipe, ordered a 3’ section on Amazon

Needed to run 2J intake with Peron kit:
- 1x HPS 3” OD x 3” Long aluminum joiner tube to connect the 2JR intake to induction tubing at turbo inlet

Recommended for high boost application (over 29psi):
- 1x Dizzy MAP tap and 3.5bar (OR) 5bar MAP sensor w/ PnP harness

Optional, but welcome, additions:
- 1x ARP thread sealer for NPT fittings at turbo (boost reference and oil feed)
- Manifold, screamer pipe and downpipe exhaust wrap
- Turbo blanket

Hope this helps someone... but if you’re getting yourself into this you’ll run into needing quite a few things. Not all of this is totally necessary but yeah... it basically is if you have high miles on your car like me or parts purchased inappropriately suited for this kit.


Attachments

Last edited:
OP
xxiaze

xxiaze

Active member
Messages
624
Likes
627
Location
West Bend, WI, USA
Thread Starter #249
Did he modify the one you got from koozy, or make up a whole new one?
Oh I never got one from koozy, just used that as a picture of what was needed for the Peron kit.. I hadn’t had mine made yet. Just got that finished this morning. I’ll change the picture in previous post to show mine. He in fact did make a whole new one utilizing an OEM return line, just chop and extend/change angle.


OP
xxiaze

xxiaze

Active member
Messages
624
Likes
627
Location
West Bend, WI, USA
Thread Starter #251
So the Peron kit didn't even come with a drain tube?

Sent from my SM-N975U1 using Tapatalk
No, it did not. It came with a silicone tube to extend your factory drain line (see pic below). So here’s the thing though. I believe up to MY16’ there was a drain line that was much more robust that utilized silicone tube as OEM then beyond MY16’ they went to the SS drain line style as seen above... it is much thinner and cheaper feeling, BUT it has those bellows to help it flex. That being said you either would have had to cut the SS line in half and extend it with a silicone slip joiner tube or take the factory silicone joint out and put a new length in. My car is the MY14’ so I actually had the silicone style return line (see picture below) but I didn’t trust that just extending the silicone line and worm clamping wouldn’t have leaked. I wanted a 100% closed unit. @Rocketst had some oil leaking issues with the SS line being cut and extended, he couldn’t get it not to leak. So I didn’t want to risk it. The lower year model with the silicone does have barbs at either end of the tube so it probably would have been fine with extending the tube and clamping but yeah...


Attachments

TyphoonFiST

9000 Post Club
Premium Account
Messages
11,513
Likes
8,007
Location
Rich-fizzield
Just figured with the price tags of some of these "kits" that it would've came with a nice drain tube.

Sent from my SM-N975U1 using Tapatalk


OP
xxiaze

xxiaze

Active member
Messages
624
Likes
627
Location
West Bend, WI, USA
Thread Starter #253
Just figured with the price tags of some of these "kits" that it would've came with a nice drain tube.

Sent from my SM-N975U1 using Tapatalk
One would think... I’d say what was totally necessary and missing in the kit has only cost me an additional 150$ in parts plus leg work, gas money and research. All part of the chase I suppose though. I’d say overall it was pretty complete and what was provided would have “worked” but not perfectly. Only really MISSING the exhaust manifold gasket and the boost reference bung on the compressor housing. I totally agree with you though.


Last edited:

shouldbeasy

1000 Post Club
Messages
1,469
Likes
824
Location
Calgary, AB, Canada
Just finished wrapping the downpipe and manifold in titanium wrap... hopefully it holds up alright. It’s not the tightest in the world and the steel bands that came with the roll are kinda wonky. Had to use some worm clamps here and there too. Not going for beauty lol... does anyone know how long this type of application usually holds up?

View attachment 38076
As long as you don't touch it, it should last quite a while. It seems to harden with heat and then becomes brittle if you try to pull it off (aka it's a one use item).


OP
xxiaze

xxiaze

Active member
Messages
624
Likes
627
Location
West Bend, WI, USA
Thread Starter #255
As long as you don't touch it, it should last quite a while. It seems to harden with heat and then becomes brittle if you try to pull it off (aka it's a one use item).
Thank you friend. I’m reading like 3-4 years. I’m sure that depends on mileage etc... but that would be a solid amount of time. I’d be happy with that.


OP
xxiaze

xxiaze

Active member
Messages
624
Likes
627
Location
West Bend, WI, USA
Thread Starter #256
Cars just been sitting here rotting for 6 months... I CANNOT wait for spring and last few parts I need to finish this major overhaul. Dying to drive it. Not really sure what this big turbo setup will be like... hope it’s amazing! Feels like it’s been forever in the making. Super pumped. Just waiting on my aux fuel spacers from machine shop, new boost control solenoid from @TyphoonFiST, innovate ethanol content gauge from Ron, exhaust rework from neighbor, and plumbing for the ethanol gauge from Radium... still need to wire in the aux fuel, but kept breaking plastic clips and stuff so waiting for the warmth to fade in, need to install the new LPFP. I guess as I’m typing there’s plenty to do yet. Anticipation killing me lol.

761E75C0-67A4-4999-BAF2-1ED359B2CBFF.jpeg


OP
xxiaze

xxiaze

Active member
Messages
624
Likes
627
Location
West Bend, WI, USA
Thread Starter #257
Ethanol gauge just showed up from whoosh.. looks good. Just waiting on whoosh vent pod and fittings/plumbing from radium to hook it all up. The fittings and fuel line etc was like half the cost of gauge set up lol... I looked into others installs but unfortunately both my fuel pump location AND under hood locations are compromised because of aftermarket parts and couldn’t quite install the way I’ve seen others do this. Sooo... hopefully I ordered everything right.

F1A7FE2A-DBFE-445D-9207-FAF5C3BE07EA.jpeg


OP
xxiaze

xxiaze

Active member
Messages
624
Likes
627
Location
West Bend, WI, USA
Thread Starter #258
Got the new fuel pump in, but had to trim back the access grommet to accommodate the feed line and AN fittings... hopefully it doesn’t smell too nascar in here now.
D2C0BB1E-D568-4B6C-8CAB-56CF0066F5A6.jpeg 74D9A521-BA98-40F3-813E-C6FEE2681285.jpeg 792C4F7A-7681-4515-8358-BBFE5A494935.jpeg


M-Sport fan

9000 Post Club
Messages
14,103
Likes
6,755
Location
Princeton, N.J.
If it does start reeking, you could just throw some Gorilla tape over it (I would not trust silicone sealer, or Plasti Dip, potentially getting into the fuel system).

It's cool that our in-tank pumps are so accessible, as on my Z28, the whole tank, and a bunch of other stuff had to be fully dropped out of the car, in order to get to the pump.

I never realized that Delphi made parts for Ford.


OP
xxiaze

xxiaze

Active member
Messages
624
Likes
627
Location
West Bend, WI, USA
Thread Starter #260
If it does start reeking, you could just throw some Gorilla tape over it (I would not trust silicone sealer, or Plasti Dip, potentially getting into the fuel system).

It's cool that our in-tank pumps are so accessible, as on my Z28, the whole tank, and a bunch of other stuff had to be fully dropped out of the car, in order to get to the pump.

I never realized that Delphi made parts for Ford.
Gorilla tape is brilliant good sir! I’ll probably just throw some on now to nip it in the bud. And yes certainly grateful there is easy access with minimal modification needed to get into it. I think I’m going to take it apart again because I fear the mating pass through AN fitting might be loose, don’t want an evap code for pressure leak. It’s probably fine, but it’s been bothering me all morning.


Top