• Sign Up! To view all forums and unlock additional cool features

    Welcome to the #1 Fiesta ST Forum and Fiesta ST community dedicated to Fiesta ST owners and enthusiasts. Register for an account, it's free and it's easy, so don't hesitate to join the Fiesta ST Forum today!


Really Should Stop Modifying my Daily Driver into a Track Car

OP
Fusion Works

Fusion Works

Active member
Messages
672
Likes
886
Location
Huntsville, AL, USA
Thread Starter #42
Gross. Guess I will be cutting that out and fixing it. Yay Mishimoto quality


I hated the Mishimoto fan shroud solution so I welded some mounts onto the radiator to use the stock fan, which of course I modified as usual. I hated that their shroud rubbed directly on the cooling tubes and fins. That can't be good for durability. I will straighten up that crooked cut and put a piece of material to seal and stiffen the OE shroud where I cut it.


Also looking at changing the lower radiator hose from 1.125 to 1.25. Its weird that Ford used 1.25 for the intlet to the Tstat housing, but 1.125 at the radiator. Why? So I am just gonna make an aluminum tube out of 1.25 bends and then fix that sloppy outlet on the radiator. This should help flow around the system. Plus should help cooling and cut down on a potential failure point in the rubber hose.


OP
Fusion Works

Fusion Works

Active member
Messages
672
Likes
886
Location
Huntsville, AL, USA
Thread Starter #43
Pretty sure I just voided the warranty, Mishimoto, LOL.


Yep you can see how bad the misalignment was on the lower hose outlet. I cut it off and am prepping for a new slightly larger outlet tube and hose to the T-stat.


The new outlet looks massive, but its only .125 larger. The T-stat inlet nipple is 1.25in the outlet on the radiator was 1.125in. Not sure why Ford used two different sizes, but I am just going to make an aluminum tube that is 1.25in from end to end.


OP
Fusion Works

Fusion Works

Active member
Messages
672
Likes
886
Location
Huntsville, AL, USA
Thread Starter #44
Welded up the new water outlet on the radiator. Will take pics shortly.

Been working on a half dozen different things that need to be done since having the bumper cover off makes all of this easier.

Splitter hangers.

I made two nut plates that bolt inside the legs of the crash beam. These hangers bolt inside the legs of the crash beam beside the radiator. I will make brackets that pick up the splitter once I get all the front end work done.

Started forming some brake ducts this evening. The foglights are worthless, so lets make those nicely shaped trim rings do something useful.


Yes I flared both ends, because I had this one straight piece of 3in tube and will cut it in half when I am finished. I'll make a flat flange that will pick up the OE foglight mounting holes and then pass through the fender liner. Not sure if I am gonna do a full blown tube into the brake rotors or just do a deflector on the control arm that directs air all into the rotor, caliper, axle, etc.

Also working on a few other projects at one time. Checked the rear spring rate and length for the ST Sport Springs. Hint, they are far from what I have listed the rates as based on ST's claims. Once they send me the rates again, I will post my rear rate measurement in another thread.

Starting to think about springs and dampers. One thing I noticed on the rear springs and Ford even addressed this with the new Fiesta, which we can't have. The rear spring, at ride height, has a huge bow in that spring. That is a problem. Ford busted out the Banana spring on the back of the new Fiesta ST. Claimed it solved several problems they didn't like in the Mk7 ST.
https://www.sae.org/publications/technical-papers/content/2017-01-1573/preview/

I am starting to think about an even better way to make an adjustable perch in the trailing arm without a banana spring.


OP
Fusion Works

Fusion Works

Active member
Messages
672
Likes
886
Location
Huntsville, AL, USA
Thread Starter #45
Front end of the brake ducts are done. Once the bumper goes back on for the 1milionth time, I will finish out the ducting through the fender liners into the wheel wells.


Didn't take any pics, but have been working on designing and building proper radiator ducting. More pics to follow as I get there.


OP
Fusion Works

Fusion Works

Active member
Messages
672
Likes
886
Location
Huntsville, AL, USA
Thread Starter #46
Time for some radiator ducting, proper radiator ducting, not just "make the hole bigger". This covers the upper portion of the radiator and blocks the air from going around the intercooler below the bumper beam.


Its kinda fugly, but it should work. I am even going to reuse the rubber grommets that held the shifter cable mount to the transmission (I replaced them with aluminum) to support the duct. There is room over the top of the duct for a closed "air box" section as well.

Since the air box pulls air from the radiator area, I am gong to make a duct off the right side of the grill area that directs air up on top of the radiator ducting. Then I can just seal the radiator duct top area off against the underside of the bumper. This will keep positive pressure against the feed for the engine airbox.

As you can see the radiator ducting doesn't fill the whole grill area, even the radiator doesn't take up that hole space. I cut the core support to help seal off the radiator better.

This area just needs a flat plate to block it off or I can go ahead and cover the rest of the grill opening in with my engine air duct and that area wouldn't need a plate.
One thing I didn't like, the original core covering in that area blocked exit air flow through the intercooler, so my removal of that will let some airflow go through the intercooler core as the air enters at its hottest. This will help intercooler efficiency on track.


Jabbit

2000 Post Club
Messages
2,240
Likes
2,897
Location
New England
#48
Unrelated - how often do you wish you had a 2 post lift rather than a 4 post? I really can't decide.


OP
Fusion Works

Fusion Works

Active member
Messages
672
Likes
886
Location
Huntsville, AL, USA
Thread Starter #49
Everyday. HAHA. While the four post has its uses, a two post is more useful. I will be adding a two post at some point, but at 750$ the four post was a no brainer. This is also the 15Klb four post so it will lift my truck easily and its much wider than the smaller 9Klb four posts, so I can get a lot of space between the wheels. A trolley jack would be really nice to lift the cars up off the wheels front time to time. Of course those cost more than my lift. LOL


OP
Fusion Works

Fusion Works

Active member
Messages
672
Likes
886
Location
Huntsville, AL, USA
Thread Starter #50
Some updates on the new pieces. I made a threaded insert for a tow lug and welded it into the front bumper beam.


Made it with a M24 tap I had on had so I guess I will have to make a lug for a tow strap later.

This was a Mazda RX8 tow hook. Its too small. I figured I should be stronger since I am guaranteed to get it really stuck in a sand trap with the new snow plow on the front.


\

Finished up the radiator shroud.

Added a Fin to smooth the airflow around the hood latch reinforcement. Its dumb, but why not. The top of the pan is rolled to smooth airflow into the upper portion of the grill and both ends are sealed to allow the OE air inlet to function as designed.


I also sealed up the side of the core support where the radiator doesn't overlap properly. Also opened up the core support behind the intercooler. For some reason Ford didn't leave that part of the core support open. I think its a good idea to let the air get through the core as that is the hottest spot as the air enters the heat exchanger from the engine.


OP
Fusion Works

Fusion Works

Active member
Messages
672
Likes
886
Location
Huntsville, AL, USA
Thread Starter #51
More progress on the never ending project.

Laced in some aluminum screen behind the intercooler, I noticed a few bent fins and and a bunch of rock hits so figured some protection was in order. I have used this on my other race cars with good success. Its strong and durable.


Then I got to work on some brake ducts. Unfortunately my washer bottle had to go as its too long. I am investigating products to bond polyethylene to itself. I think I could shorten the OE tank and relocate the pump, but for now its down to Windex and rain.


I terminated them just straight, pointed at the control arms. I have the option to add direct hoses to the knuckle, add deflectors mounted on the control arms , or just cap them. Right now I have some rolled up foam jammed in the front openings to make sure I wasn't affecting the cooling performance.


OP
Fusion Works

Fusion Works

Active member
Messages
672
Likes
886
Location
Huntsville, AL, USA
Thread Starter #52
Now onto the splitter. I made sure to use only the finest Georgia Pacific Composite material, available at LowesDepot world wide. Its cheapish and easy to work with, durable and replaceable.


Its coated in Rustoleum oil based paint. I think the next one I make if I use plywood, I will thin the first coat with mineral spirits to really help it soak into the wood and then put coats on top thinning less and less until done. Since I live in the south this thing will get rained on and live with stupid humidity everyday.

I found a composite product I want to try but want to see how this does for a while. Plus I need two versions, maybe three depending on who I am running with. Gridlife allows a 5in splitter for Street mod, a 3in splitter for another class. SCCA Max allows a 5in splitter in the front. This one is 3.5in. I am planning a BIG wang for the back also. Its on order.


Painted the radiator duct black cuz it looked too shiney through the grill. Also added some extensions to seal the top of the intercooler ducting to the bumper cover.

Its starting to come together.


OP
Fusion Works

Fusion Works

Active member
Messages
672
Likes
886
Location
Huntsville, AL, USA
Thread Starter #53
And its on the ground and hauling ass again.


So far I haven't knocked it off, I can get in my driveway and back out again successfully. Its drug slightly coming out of the gas station today, but I think I can live with the length. I am going to raise the front of the car slightly when I build the new dampers so that should get it a better height. I am 4in off ground right now with the wheel spats closer to 3, but they are right up at the leading edge of the wheel wells.

Now the good stuff. Car hasn't gone over 200deg even in conditions that previously would see 220-230 going over the mountain with the AC on. The charge air temps previously ran 10deg over ambient, I have currently seen -3-+5deg over ambient the last couple of days. I am geeked about the improvements. Looking forward to hitting the track in July to tests the new setup.

New wheels should be here Friday. They will look so good on this car. They will also be a pain in the ass to keep clean and no they are not White Tarmacs. HAHA


Messages
38
Likes
23
Location
Burlington, VT, USA
#54
Nice work but you need to get cracking on that 914-6 sitting abandoned behind your FiST in the first shot. While not even close to a supercar back in the day the 914-6 was a great balance between compliance and cornering ability and at 2100 lbs the 125 HP motor made for rather decent pep back when emissions controls strangled any car sold in this country. BTW, I'll bet someone with talent such as your just might be able to shoehorn a WRX or old air cooled 911 Turbo engine into that Porsche.
DAMN THATS A GOOD EYE


OP
Fusion Works

Fusion Works

Active member
Messages
672
Likes
886
Location
Huntsville, AL, USA
Thread Starter #55
You mean something like this? Yep 3.3 EG33. I have a 2.5 RS close ratio transmission to go with it. IMG_1486.JPG

This was my first car. Daily drove it for a couple of years. Totally fun for a 25year old but I don't tolerate old car shit well anymore. A warmed over 2056 with dual 44webers and some short ratio gear box. That car was a riot and crude as hell. Had to carry a towel to sop up the water leaks around the Targa top and windows, no heat, no defrost, no radio, no bluetooth anything. It was entertaining. I learned a lot about building cars with this one.
My car2.JPG

The Yellow car is my 401K and its gonna get some cool shit. I am wanting to do a steel roof, but need more time with my english wheel to get my skills up to doing such a panel. There is a pile of 996 Suspension components in the corner that I need to integrate into this car, plus a few rust repair panels. This one has no floor pans.


OP
Fusion Works

Fusion Works

Active member
Messages
672
Likes
886
Location
Huntsville, AL, USA
Thread Starter #56
My wheels arrived just in time to get the car to Cars and Coffee today. They look spectacular on the car. My joke has been, "Have I shown you my new wheels"?


I am super happy with the way the car looks and performs right now. I am gonna need to cap the brake ducts for normal driving. I think they aren't allowing the engine compartment to clear hot air as efficiently. I drove around a bit with them open today and it seems like the car is a bit hotter. Not a lot, but a little bit.

Now time to start planning suspension. Going to do custom valved Bilsteins with my own custom housings up front and some custom lower control arms with more camber and caster adjustability. Also need to install my rear camber shims and remove the dust shields on the rear rotors.


OP
Fusion Works

Fusion Works

Active member
Messages
672
Likes
886
Location
Huntsville, AL, USA
Thread Starter #57
Well my timeline got all shuffled around because of a clutch issue. Note to those who make the change. Don't run a stock clutch disk with a solid flywheel. I got 15K miles out of mine before it stripped the splined up out out of the disk itself. Seems like Ford just pressed the center splines into the disk and it has a 1in surface area with a few little splines holding it into the sheetmetal in the center of the disk.


So I ordered a Spec stage 3 with a sprung hub, new slave and went to work. Clutch went in just fine and works great. Pedal feel is slightly heavier than the stock one but not by much. Happy enough with it.

Then its time to get into the suspension. Wanted to eliminate the compliance bushing in the lower control arms. This would make things more stable under heavy braking.


Didn't take a pic of the finished bearing install, but I used the SPC X-Axis joints since they have a nice boot on them. Car feels great under braking and I only noticed a minor increase in impact harshness through the floorboard.

Next update the fancy new suspension.


OP
Fusion Works

Fusion Works

Active member
Messages
672
Likes
886
Location
Huntsville, AL, USA
Thread Starter #58
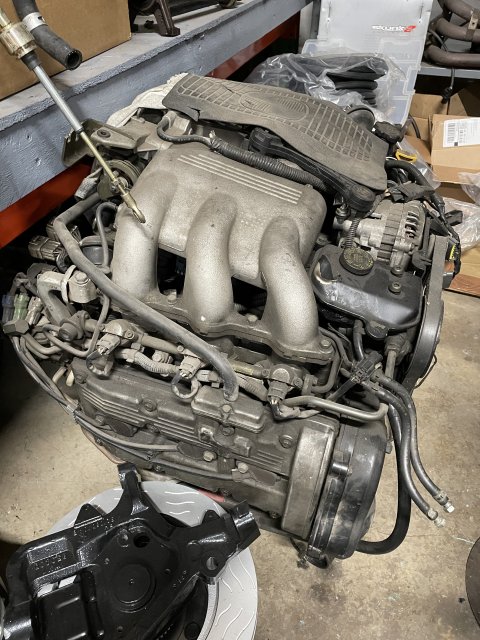
Didn't like the off the shelf options. Hate Chineasum garbage "tuna" shocks. The Bilsteins are nice but the B14 didn't want have what I wanted for spring rates and the damping was too soft so I built my own using Bilstein rear dampers and a Bilstein insert that I use for other custom strut builds.

The rear shocks started here:
https://www.fiestastforum.com/threads/bilstein-science-experiment.29105/

After I cut a new snap ring groove in the bodies I revalved them to give proper damping forces for my expected spring rates. I left a bit of room over the top since I am gonna run slightly softer springs on the street and add spring rubbers for the track to help balance the chassis.

The fronts are a custom housing that I had built when I did some Focus SVT struts so I made my own mounting ears and added all the tabs. Then built some custom inverted Bilsteins to go inside.


Wanted to keep the OE upper strut mount I had to make an aluminum adapter to keep the OE strut bearing and use a 2.5in coil spring.


Of course I didn't finish all these parts until minutes before the car needed to go on the trailer and head to the track. LOL. Figure out way to late I didn't have the right springs on the shelf. Was intending to run 300s front and 400s rear. Instead the 300s were some garbage Chinese springs and turns out they were bent. So I had to use the 400s on the front and put some 450s on the rear. A little too much spring, but damn she turns nice. New springs are on order gonna use 300 fronts and 250 rears, can always add spring rubbers to bring the rear rates up to where they need to be on track.

Anyways, the track day at Nashville Super Speedway went pretty well all things considered and I am pulling all the front parts back out for plating. Then I can fix the spring rates and it should be good to go for a while.

I definitely need to get the rear WANG mounted, the car almost spun at 120 on the oval, so that tells me there needs to be more negative lift on the rear of the car to balance out the splitter.

Got this Mini Big Wang from Nine Lives Racing and wanted to create my own version of the Airtec wing using a proper aerofoil profile, so this one is 48in wide and am going to mount it right over the top of the OE spoiler. More on that to come.


Business6

Senior Member
Messages
899
Likes
880
Location
Northern UT
#59
I absolutely love the radiator duct. That would be a fantastic thing to team up with Ron on.

You're also batshit crazy with these ideas and fabrication so keep up the good work! It's awesome!


OP
Fusion Works

Fusion Works

Active member
Messages
672
Likes
886
Location
Huntsville, AL, USA
Thread Starter #60
No one can afford it. LOL. I have an absurd amount of time in it. It was a good project to work on, though.

I noticed a few things. Since the ducting and radiator upgrades, Temps have never gone over 200 in normal driving where I was seeing 220+ on a regular basis driving over the mountain to my shop, 90+ outside temps, AC on, in traffic or without traffic running 70+mph. Splitter didn't seem to change cooling ability. This past week when I put the new clutch in I left the splitter off and drove it like a sane, boring person, its been 95+ deg here all week. To install the splitter I had to completely remove the factory air dam and most of the upper plastic where it mounts. So there is no low pressure area created under the car without the splitter installed. Water temps still wouldn't go over 200deg. That makes me quite happy.

My splitter survived a couple of serious off road events at the track Thursday with hardly a scratch. Probably protected the oil pan as well, HAHA. With the new ride height (higher than with the ST lowering springs) the splitter needs to be lower. Think I am gonna make another one that is a little smaller and can keep it at the current height, then use taller brackets for the "track version" to mount it lower for track use.


Top