• Sign Up! To view all forums and unlock additional cool features

    Welcome to the #1 Fiesta ST Forum and Fiesta ST community dedicated to Fiesta ST owners and enthusiasts. Register for an account, it's free and it's easy, so don't hesitate to join the Fiesta ST Forum today!


Things That Should've Been in the Manual But Aren't

Perry

Active member
Messages
611
Likes
51
Location
Leawood
#1
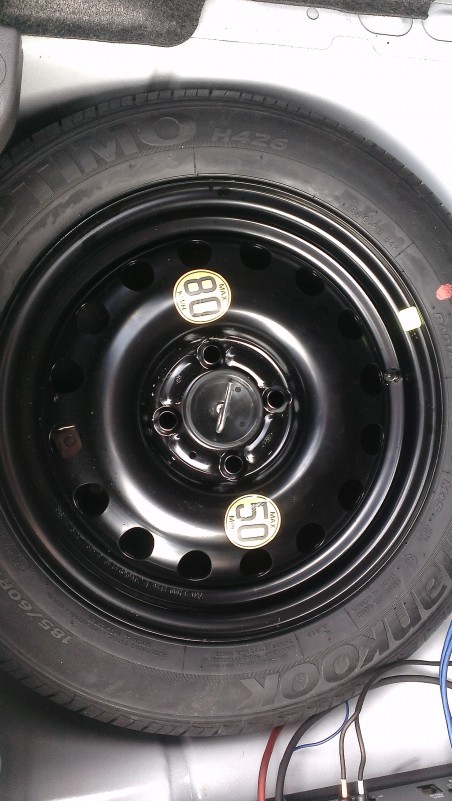
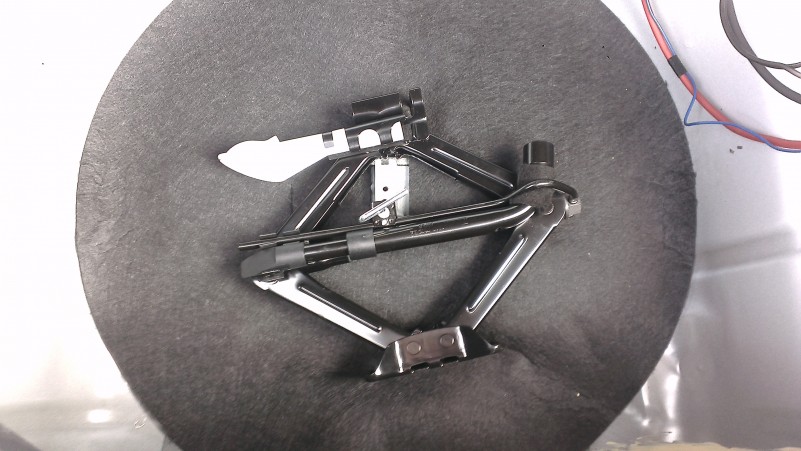
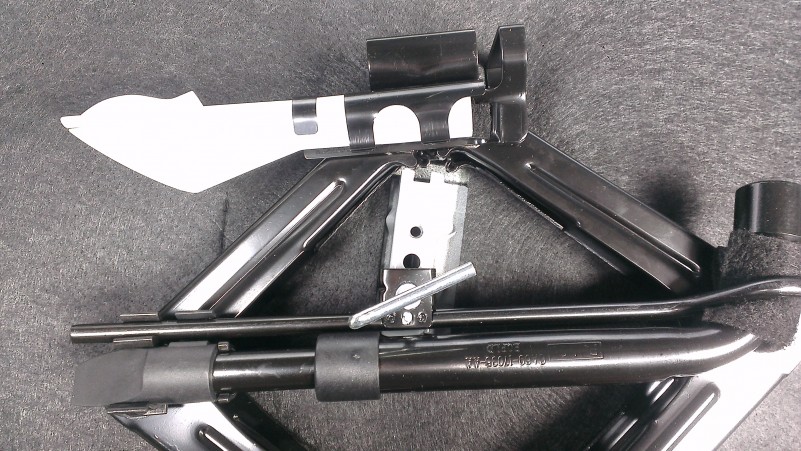
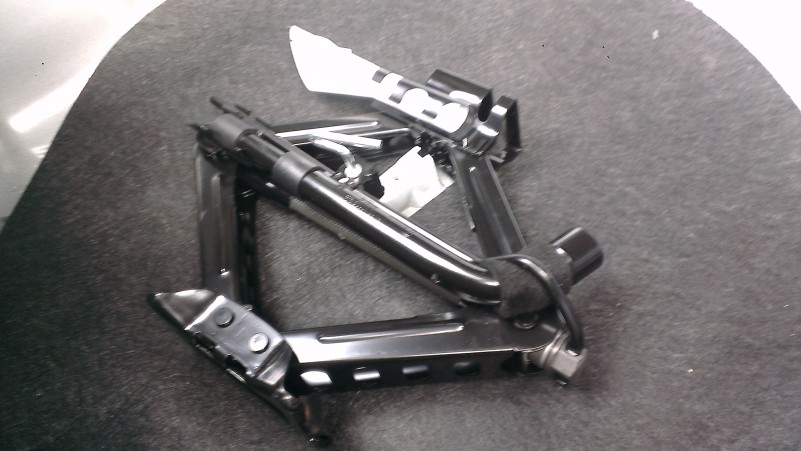
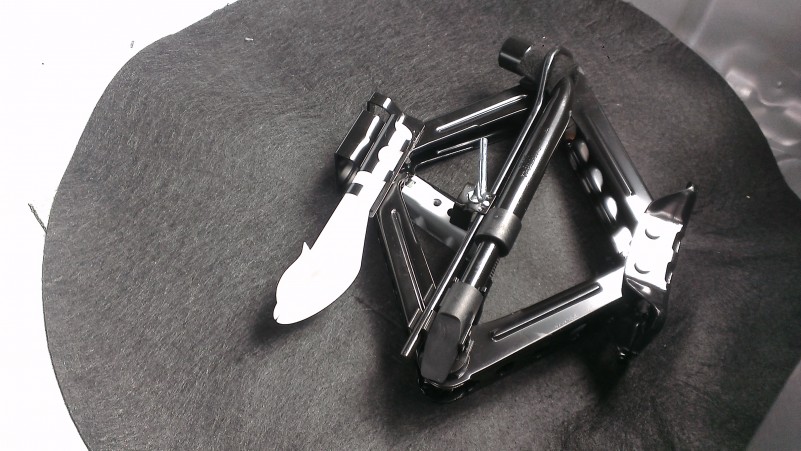
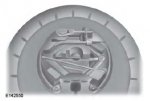
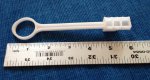
I'll start with this one: A photograph of just exactly how the spare tire/wheel, tire iron/wheel wrench, and thingamabobby were stored, so you can get it back in properly later. Somebody got a pic of the "OEM storage" of these? I don't/can't, 'cuz I took mine out and then couldn't get it back the same way. (I can never get stuff back into its original packaging it seems. All started with Brenda and an improperly fixed bra strap her mother noticed one night long ago. Apparently a hook was missed or something, I dunno. I'm still paying for that one. . . .)


BlueBomber

1000 Post Club
Messages
1,086
Likes
118
Location
Anaheim
#2
Perry,

I ran into the same issue. I cannot reassemble my jack/spare the way it was before I took it apart the first time. Faaaaaahk.


OP
Perry

Perry

Active member
Messages
611
Likes
51
Location
Leawood
Thread Starter #3
Perry,

I ran into the same issue. I cannot reassemble my jack/spare the way it was before I took it apart the first time. Faaaaaahk.
I'm just glad I'm not the only one!


Colin1337

1000 Post Club
Messages
1,488
Likes
61
Location
Kirtland AFB
#4
Haha thought I was the only one with this issue!
Just an excuse to take it out and save some weight.


MKVIIST

5000 Post Club
Staff Member
Premium Account
Messages
5,774
Likes
1,036
#5
Perry, you need a picture of the way the jack is mounted beneath the spare? I can take a picture for you.


OP
Perry

Perry

Active member
Messages
611
Likes
51
Location
Leawood
Thread Starter #6
Perry, you need a picture of the way the jack is mounted beneath the spare? I can take a picture for you.
That'd be awesome! If you could include it here--actually, maybe a couple pics of how it looks as one first accesses the spare and then the "underneath" structure of how the wrench, etc. are attached under the spare--that'd be great.

I really do think this is one of those things for which a picture could/should have been included in the manual--or at least in an online version of the manual, in which size, number of pics, etc. isn't a limiting factor. [Frankly, all vehicles should come with an online, continually updated reference manual, in my opinion. Included in that document/site would be news re: recalls, software updates, aftermarket mods and packages available through the dealer, etc.]


Colin1337

1000 Post Club
Messages
1,488
Likes
61
Location
Kirtland AFB
#7
Also, anyone know how to reset the drivers automatic window feature? I disconnected my battery and now it doesn't do the whole "one click" thing


rodmoe

5000 Post Club
Messages
5,810
Likes
582
Location
wausau
#8
Also, anyone know how to reset the drivers automatic window feature? I disconnected my battery and now it doesn't do the whole "one click" thing
Resetting the Bounce-Back Feature
WARNING
The bounce-back feature remains
turned off until you reset the
memory.
If you have disconnected the battery, you
must reset the bounce-back memory
separately for each window.
1. Lift and hold the switch until the
window is fully closed.
2. Release the switch.
3. Lift the switch again for one more
second.
4. Press and hold the switch until the
window is fully open.
5. Release the switch.
6. Lift and hold the switch until the
window is fully closed.
7. Open the window and then try to close
it automatically.
8. Reset and repeat the procedure if the
window does not close automatically.


rodmoe

5000 Post Club
Messages
5,810
Likes
582
Location
wausau
#9
That'd be awesome! If you could include it here--actually, maybe a couple pics of how it looks as one first accesses the spare and then the "underneath" structure of how the wrench, etc. are attached under the spare--that'd be great.

I really do think this is one of those things for which a picture could/should have been included in the manual--or at least in an online version of the manual, in which size, number of pics, etc. isn't a limiting factor. [Frankly, all vehicles should come with an online, continually updated reference manual, in my opinion. Included in that document/site would be news re: recalls, software updates, aftermarket mods and packages available through the dealer, etc.]
Page 231 of the manual (on the manual page not the pdf file page as mine showed page 235)3 printing linky


Colin1337

1000 Post Club
Messages
1,488
Likes
61
Location
Kirtland AFB
#10
Resetting the Bounce-Back Feature
WARNING
The bounce-back feature remains
turned off until you reset the
memory.
If you have disconnected the battery, you
must reset the bounce-back memory
separately for each window.
1. Lift and hold the switch until the
window is fully closed.
2. Release the switch.
3. Lift the switch again for one more
second.
4. Press and hold the switch until the
window is fully open.
5. Release the switch.
6. Lift and hold the switch until the
window is fully closed.
7. Open the window and then try to close
it automatically.
8. Reset and repeat the procedure if the
window does not close automatically.
Geez, this is like putting a cheat code in a video game lol


rodmoe

5000 Post Club
Messages
5,810
Likes
582
Location
wausau
#11
Yup much like my FRS was and it would loose its mind EVERY time it was left out in the cold with damp window seals (ie warm days cold nights) at least this one isn't that bad...


OP
Perry

Perry

Active member
Messages
611
Likes
51
Location
Leawood
Thread Starter #13
Awesome, thanks, MKVIIST!

Rod, my manual pdf has an image on page 232 that's kinda sorta (well, not really) helpful about stowage of these items--too little contrast, too much clutter, too difficult to attain orientation. Is this what you're referring to?

I couldn't really tell what was going on there. Maybe just me, though.


Attachments

OP
Perry

Perry

Active member
Messages
611
Likes
51
Location
Leawood
Thread Starter #17
Okay, here's another thing that would be nice to have in the manual: Instructions for use of the Ford Trigger TPMS activation tool. Since the vehicle comes with summer-only tires, obviously many FiST owners will be swapping between winter and summer rigs, and will be faced with the TPMS issue in one way or another. So, here's the 411 on that. [Note: These instructions are specific for Ford/Lincoln/Mercury vehicles with push-button starting.]

Ford Trigger TPMS activation tool:


1. Make sure all tires are inflated to the vehicle specifications.
2. Make sure ignition button is OFF, then press and release the brake pedal.
3. Hold the ignition button down for 2 seconds, release it, and then tap the ignition button once. The vehicle should be OFF. Hold the ignition button down for another two seconds, release it, and then tap the button once.
4. Hold the ignition button down for two seconds again. The vehicle should be in RUN mode, engine off.
5. Press and release the brake pedal.
6. Tap the ignition button once, so the vehicle is OFF.
7. Hold the ignition button down for 2 seconds, release it, and then tap the button once. The vehicle should be OFF. Hold the ignition button down for another two seconds, release it, and then tap the button once.
8. Hold the ignition button down for two seconds again. The vehicle should be in RUN mode, engine off.
9. The horn should sound letting you know the vehicle has entered into TPMS relearn mode.
10. Place the top of the FORDTRIGGER tool on the sidewall of the driver's side front tire in the location of the valve stem.
11. Press the button of the FORDTRIGGER tool. The vehicle's horn will sound letting you know the sensor has been learned.
12. Once the horn sounds, move on to the passenger side front tire and repeat the process. Each tire should only take 30 seconds or less.
13. After the passenger side front tire has been learned, continue on to the passenger side rear tire and finishing with the driver's side rear tire. You will move in a clockwise direction around the vehicle as you activate the TPMS sensors.
14. You may now turn the ignition to OFF. If the horn does not sound, the sensors were learned successfully. Congratulations! If the horn sounds twice, then the process must be repeated, because there was a malfunction.


OP
Perry

Perry

Active member
Messages
611
Likes
51
Location
Leawood
Thread Starter #18
And another item familiar to many forum members now, but likely to be forgotten: the clamp-tightening adventure!

[Cut & paste from a post by Shmii.]

Looking towards the front of the car, on the passenger side.

Now, from the picture above, you see that screw clamp second from the rear? It is initially very close to the plastic shield above it:

What you can really do is push it or wedge it out of the way. It's relatively flexible, and all it does is cover a belt. I wedged it out of the way by putting my socket on the screw clamp at an angle, then using that as a fulcrum to leverage the cover to the left. In fact if you look close you can see the outline of my socket wrench etched into the bottom of that cover hahahah.. Anyhow, I recommend loosening this clamp and rotating it so that it's easier to get a wrench on in the future, then tightening it up again.

Moving on, this one is on the passenger side of the intercooler:


Driver's side of the intercooler:

Close-up of the clamp closest to the intercooler - this one is a bitch to get to, in fact I just couldn't. However with a universal joint extension and a longer wrench it should be easy to get to:


And finally if you follow that same hose from the driver's side of the intercooler up the front of the engine, there are these two clamps. This is looking down on the engine from the top, standing on the passenger side:


I was able to get the driver's side (top) one by snaking my hand to the left and underneath that big L-shaped line in the foreground, but I couldn't get the bottom one as there was not enough clearance for the socket wrench. However you could easily get it with an open-ended 7mm wrench.


OP
Perry

Perry

Active member
Messages
611
Likes
51
Location
Leawood
Thread Starter #19
And just what in tarnation IS this thing?

Some folks have found one of these in the glove box. Nobody has admitted to knowing what it is, and several people have claimed complete ignorance, including myself. No pics of it in the Owner's Manual. On another forum, answers have been offered that are generally less than helpful. Putting it here just in case it's important.


Attachments

Messages
844
Likes
41
Location
Culleoka
#20
Perry, I had one of those "tools" in my glove box, too. My dealer had no clue (first one they have seen). My brother (retired GM) hazarded a guess that it is used in the assembly process and the line worker just left it in the car after it "served its purpose"...what ever that is. He assumes the line worker is suppose to dispose of the tool after assembly, but occasionally just leaves it in the car. Then, when the dealer prep folks found it, and not knowing what it is, thru it in the glove box. I'm curious what it is, too.

Does anybody have any contacts at the Mexico assembly plant?


Top